Upgrading an existing Windows v3.X.Y installation to v3.1.1.4
This guide will walk you through upgrading your existing v3.X.Y installation to v3.1.1.4. If you currently have a 0.3.x version of QATrack+, you first need to follow the instructions to upgrade to 3.1, before carrying out these instructions.
Take a snapshot
If your QATrack+ server exists on a virtual machine, now would be a great time to take a snapshot of your VM in case you need to restore it later! Consult with your IT department on how to do this.
Backing up your database
It is important you back up your database before attempting to upgrade. In order to generate a backup open SQL Server Management Studio (SSMS), right click on your database then select Tasks -> Back Up..
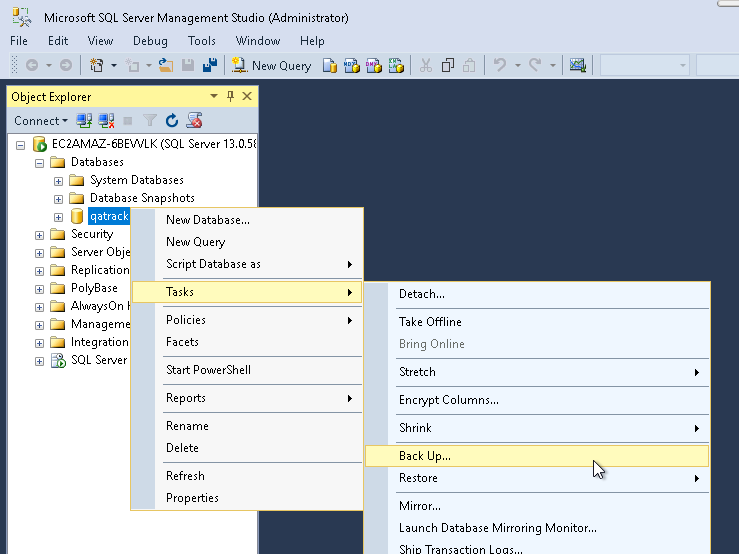
Backup Menu Item
Select Copy-only backup and make sure the Backup component is set to Database. Take note of where the backup is being stored and then click OK:
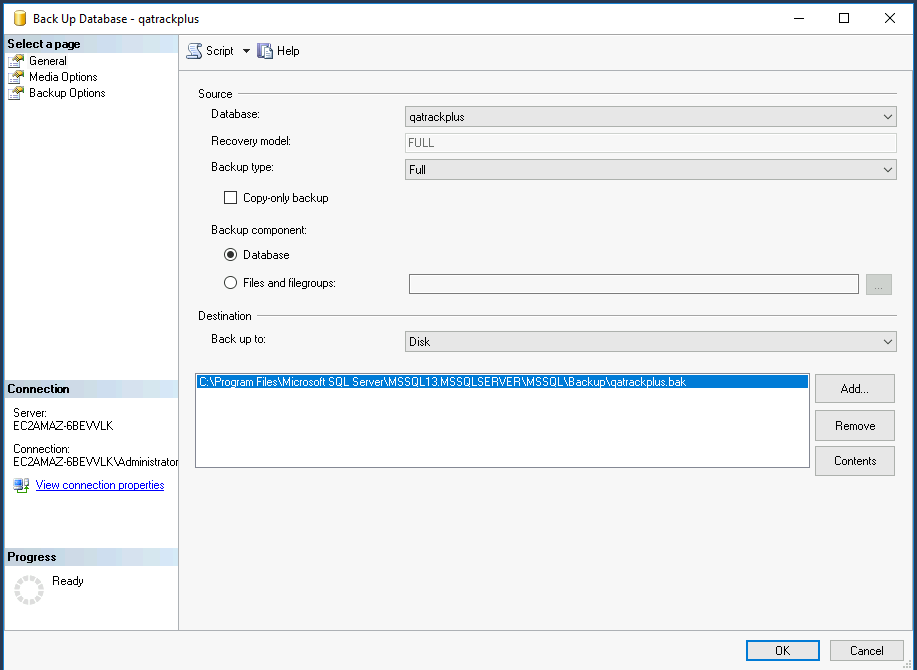
Backup Dialog
Checking out version 3.1.1.4
First we must check out the code for version 3.1.1.4 in a PowerShell window:
cd C:\deploy\qatrackplus
git fetch origin
git checkout v3.1.1.4
Updating our Python environment
Activate your virtual environment:
cd C:\deploy
.\venvs\qatrack31\Scripts\Activate.ps1
Your command prompt should now be prefixed with (qatrack31).
It’s also a good idea to upgrade pip the Python package installer:
pip install --upgrade pip
We will now install all the libraries required for QATrack+ (be patient, this can take a few minutes!):
cd C:\deploy\qatrackplus
pip install -r requirements\win.txt
Performing the migration
We can now migrate the tables in our database:
python manage.py migrate
and then we need to update all our static media files:
python manage.py collectstatic
Restart QATrack+
Finally we need to restart QATrack+
python manage.py QATrack31CherryPyService.py restart
Stop-ScheduledTask -TaskName "QATrack+ Django Q Cluster"
Start-ScheduledTask -TaskName "QATrack+ Django Q Cluster"