Email Notifications
QATrack+ comes with a number of built in email notification types that can be triggered by actions taken on the site or scheduled to be delivered at a specific time. Currently the availble notification types are:
Configuring Notifications
Through the use of Recipient Groups, Unit Groups, Test List Groups, and Part Category Groups notifications can be configured so that they are only apply to certain Units & Test Lists and are only sent to specific users. Configuring these notification groups is done in the admin area under the Notifications header:
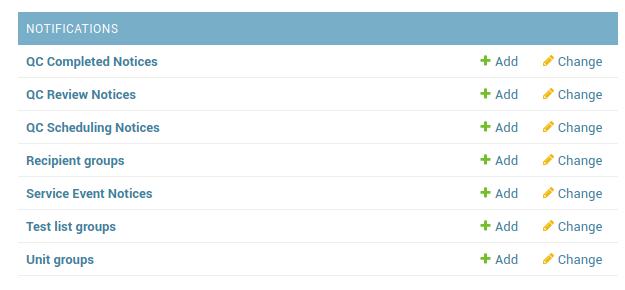
The Notification admin section
These notifications groups can either be configured on the fly when creating/editing new notifications, or defined ahead of time.
Recipient Groups
QATrack+ allows you to target notifications to specific users/email addresses using Recipient Groups. A Recipient Group is made up of User Groups, Users, or individual email addresses. To create a new Recipient Group click through the Recipient groups link in the Notifications section of the admin area and then on the next page click Add Recipient Group and then fill out the fields:
- Name (required)
Give the recipient group a relavant name
- Groups (optional)
All users included in these Group will receive the notifications.
- Users (optional)
Include any individual Users you want to receive the notifications.
- Extra recipient emails (optional)
Include any emails which are not associated with a QATrack+ User
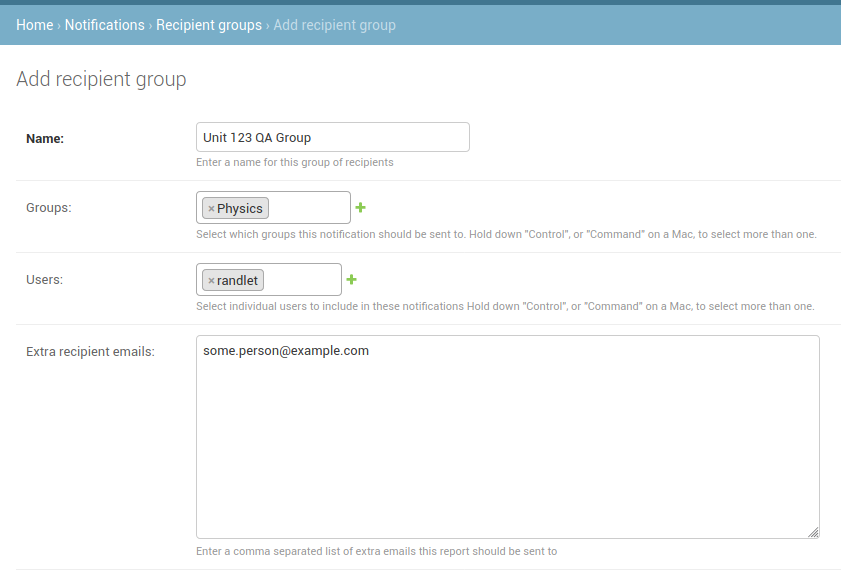
Filling out the fields for a recipient group.
and finally click Save. This Recipient Group can now be associated with Notifications.
Unit Groups
A Unit Group is made up of one or more Units and allows you to target notifications to specific Units using Unit Groups. To create a new Unit Group click through the Unit Group section of the admin and then on the next page click Add Unit Group and then fill out the fields:
- Name (required)
Give the Units Group a relevant name
- Units (required)
Select the Units to include in this group.
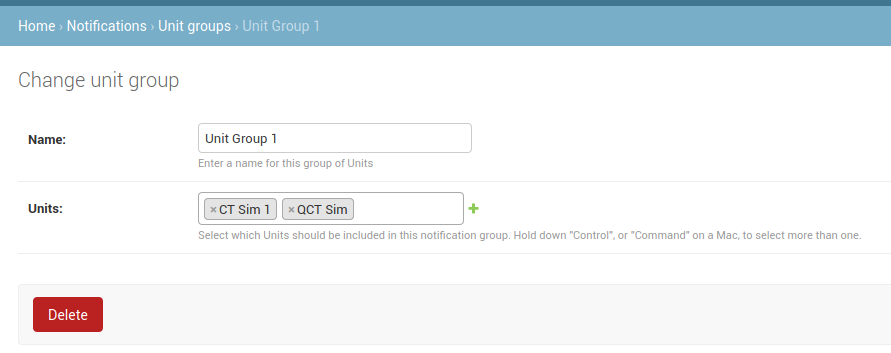
Filling out the fields for a Unit group.
and finally click Save. This Unit Group can now be associated with Notifications.
Test List Groups
A Test List Group is made up of one or more Test Lists and allows you to target notifications to specific Test Lists using Test List Groups. To create a new Test List Group click through the Test List Group section of the admin and then on the next page click Add Test List Group and then fill out the fields:
- Name (required)
Give the Test List Group a relevant name
- Test Lists (required)
Select the Test Lists to include in this group.
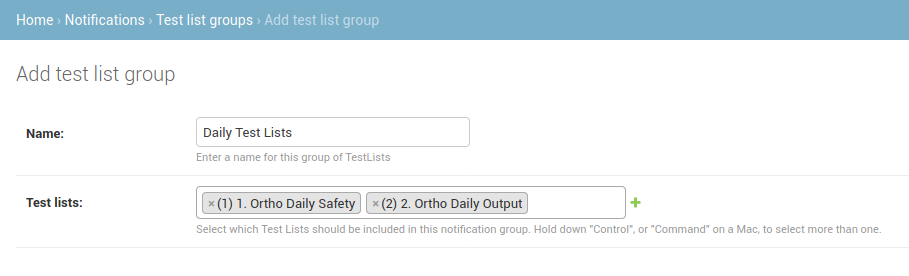
Filling out the fields for a Test List group.
and finally click Save. This Test List Group can now be associated with Notifications.
Part Category Groups
A Part Category Groups is made up of one or more Part Categories and allows you to target Part notifications to specific Part Categories using Part Category Groups. To create a new Part Category Group click through the Part Category Group section of the admin and then on the next page click Add Part Category Group and then fill out the fields:
- Name (required)
Give the Units Group a relevant name
- Part Categories (required)
Select the Part Categories to include in this group.
and finally click Save. This Part Category Group can now be associated with Notifications.
QC Completed Notices
These notifications are triggered after a user submits a Test List. There are 4 subtypes of QC Completed Notices:
Notify when Test List Completed: This type of notice is triggered any time a user submits a completed Test List.
Notify on Test at Tolerance or Action: This type of notice is triggered when a user submits a Test List that has Test Instances which are at tolerance or action level.
Notify on Test at Action level only: This is the same type of notice as Notify on Test at Tolerance or Action but is only sent for Test Instances which are outside of Action level.
Follow up notification: This notification type allows you to have an email notice sent a certain number of days after a Test List is submitted.
To create a new QC Completed Notice click through the QC Completed Notices section of the Notification admin section and then on the next page click Add QC Completed Notice and then fill out the fields:
- Notification Type (required):
Select the notification type you want to create
- Follow up days (Follow up notifiation Only):
Set the number of days after a test list being completed that you want a follow up email sent.
- Recipients (required):
Select the recipient group you want this notification sent to.
- Unit Group filter (optional):
If you want this notification to only pertain to specific units, select a Unit Group filter.
- Test List Group filter (optional):
If you want this notification to only pertain to specific units, select a Unit Group filter.
Click Save once you have configured the notification the way you want.
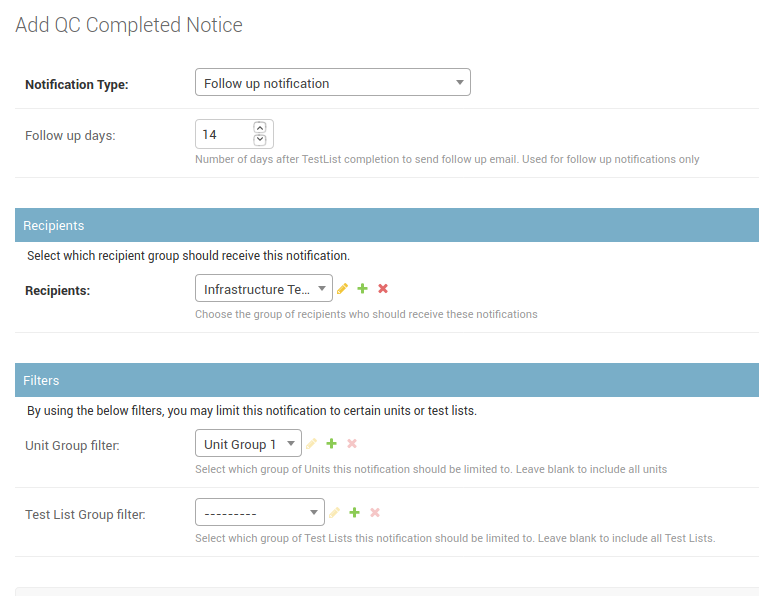
Filling out the fields for a QC Completed notice.
QC Review Notices
There is currently only one subtype of QC Review Notice:
Notify about test list instances awaiting review: This is a scheduled notification that can be sent to remind staff that there is completed QC awaiting review.
To create a new QC Review Notice click through the QC Review Notices section of the Notification admin section and then on the next page click Add QC Review Notice and then fill out the fields:
- Notification Type (required):
Select the notification type you want to create
- Send Empty (required):
Should this notice be sent even if there is no QC to currently notify about?
- Recurrences (required):
Create a recurrence rule to define the days you want this notice sent.
- Time of day (required):
Select the time of day you want the notice sent.
- Recipients (required):
Select the recipient group you want this notification sent to.
- Unit Group filter (optional):
If you want this notification to only pertain to specific units, select a Unit Group filter.
- Test List Group filter (optional):
If you want this notification to only pertain to specific units, select a Unit Group filter.
Click Save once you have configured the notification the way you want.
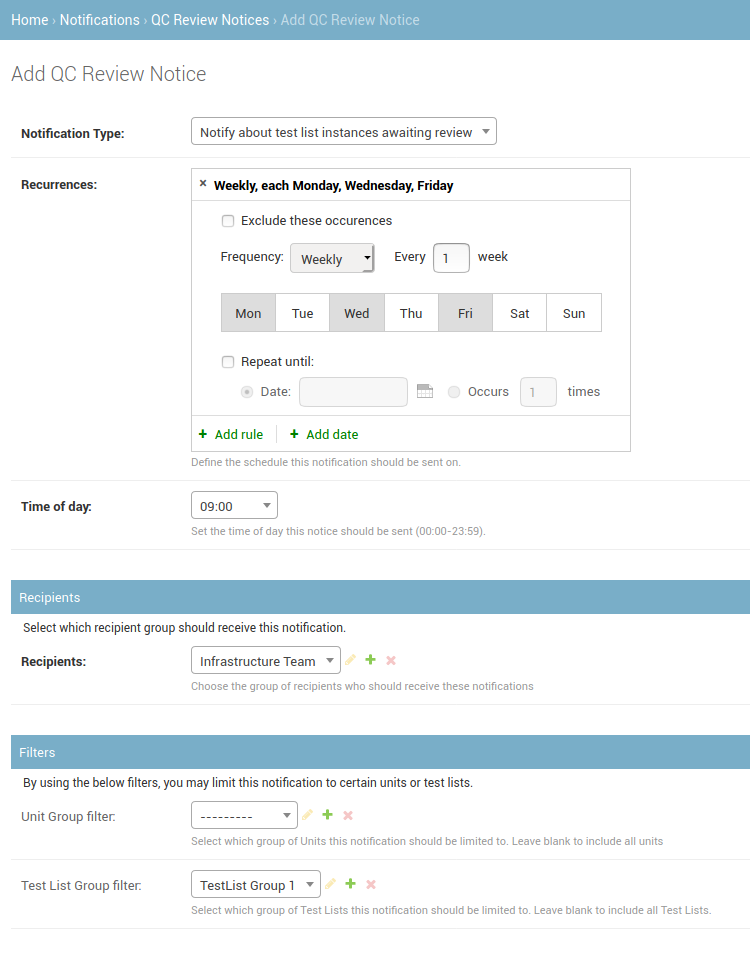
Filling out the fields for a QC Review notice to be sent at 9am Mon Wed Fri.
QC Scheduling Notices
These scheduled notices are available to help you keep on top of what QC is due and when. There are four sub types of notifications that can be configured:
Notify about all Test Lists Due Dates This notification will send an email that contains all of the currently scheduled QC and when it is due.
Notify about Test Lists currently Due & Overdue This notification will send a notice about Test Lists that are currently Due or Overdue.
Notify About Test Lists Currently Due & Overdue, and Upcoming Due Dates This notification allows you to select a future time period (e.g. 7 days) and sends an email about which QC is currently Due, Overdue, or will become Due in that time period.
Notify About Test Lists Upcoming Due Dates Only This notification allows you to select a future time period (e.g. 7 days) and sends an email about which QC will become Due in that time period.
To create a new QC Scheduling Notice click through the QC Scheduling Notices section of the Notification admin section and then on the next page click Add QC Scheduling Notice and then fill out the fields:
- Notification Type (required):
Select the notification type you want to create
- Send Empty (required):
Should this notice be sent even if there is no QC to currently notify about?
- Recurrences (required):
Create a recurrence rule to define the days you want this notice sent.
- Time of day (required):
Select the time of day you want the notice sent.
- Future Days:
Select the number of days for which you want to include upcoming due dates for QC. For example, to get a notification containing QC coming due in the next week, set future days to 7.
- Recipients (required):
Select the recipient group you want this notification sent to.
- Unit Group filter (optional):
If you want this notification to only pertain to specific units, select a Unit Group filter.
- Test List Group filter (optional):
If you want this notification to only pertain to specific units, select a Unit Group filter.
Click Save once you have configured the notification the way you want.
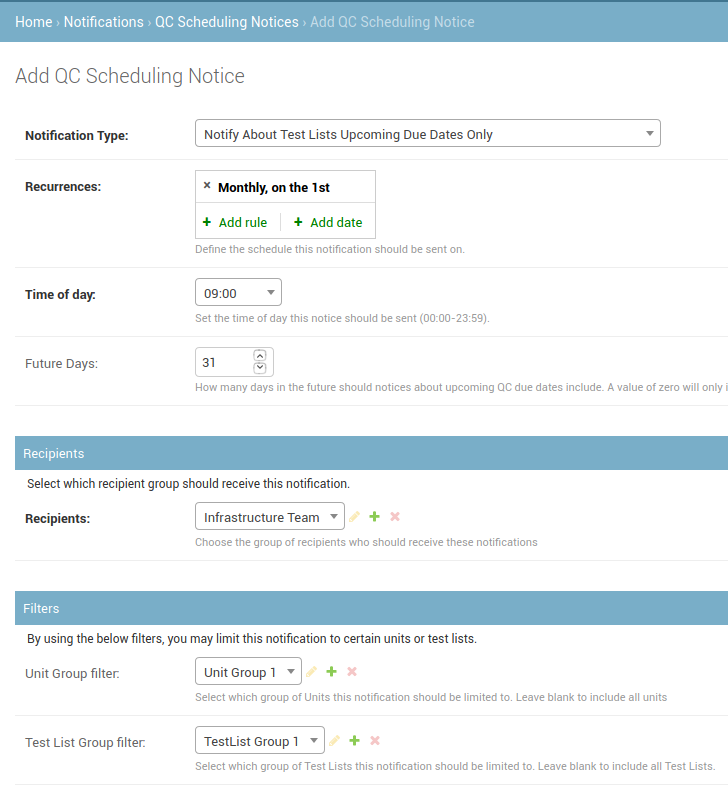
Filling out the fields for a QC Scheduling notice to be sent on the first of the month.
Service Event Notices
Service Event notices allows users to be alerted when a service event is created or modified. There are currently seven Service Event Notification subtypes:
Notify when a Service Event is created or modified Use these alerts to get an email whenever a Service Event is created or modified any way.
Notify when a Service Event is created Use these alerts to get an email whenever a Service Event is created.
Notify when a Service Event is modified in any way Use these alerts to get an email when a Service Event is modified in any way.
Notify when a Service Event Status is changed Use these alerts to get an email when the Status of Service Event is modified.
Notify when Return To Service QC is changed Use these alerts to get an email when Return to Service QC for a Service Event is added or changed.
Notify when Return To Service QC is performed Use these alerts to get an email when Return to Service QC for a Service Event is performed.
Notify when Return To Service QC is approved Use these alerts to get an email when Return to Service QC has its status updated to an approved status.
To create a new Service Event Notice click through the Service Event Notices section of the Notification admin section and then on the next page click Add Service Event Notice and then fill out the fields:
- Notification Type (required):
Select the notification type you want to create
- Recipients (required):
Select the recipient group you want this notification sent to.
- Unit Group filter (optional):
If you want this notification to only pertain to specific units, select a Unit Group filter.
Click Save once you have configured the notification the way you want.
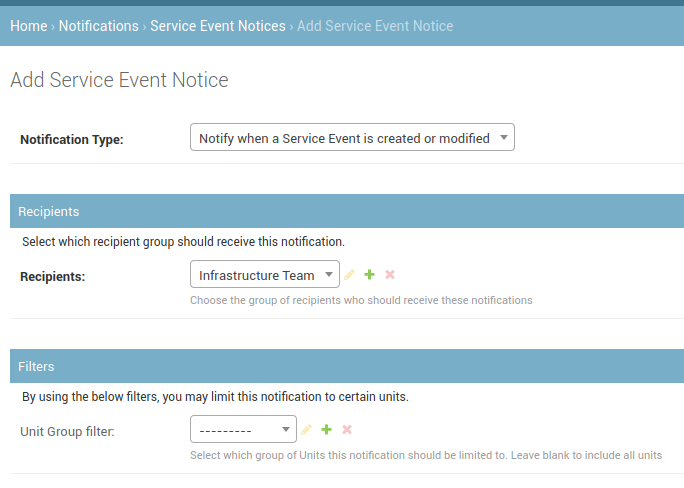
Filling out the fields for a Service Event notice.
Service Event Scheduling Notices
These scheduled notices are available to help you keep on top of which Service Event Schedules are due and when. There are four sub types of notifications that can be configured:
Notify About All Service Event Schedule Due Dates This notification will send an email that contains all of the currently scheduled service events and when they are due.
Notify about Scheduled Service Events Currently Due & Overdue This notification will send a notice about scheduled service events that are currently Due or Overdue.
Notify About Scheduled Service Events Currently Due & Overdue, and Upcoming Due Dates This notification allows you to select a future time period (e.g. 7 days) and sends an email about which scheduled service events are currently Due, Overdue, or will become Due in that time period.
Notify About Scheduled Service Events Upcoming Due Dates Only This notification allows you to select a future time period (e.g. 7 days) and sends an email about which scheduled service events will become Due in that time period.
To create a new Service Event Scheduling Notice click through the Service Event Scheduling Notices section of the Notification admin section and then on the next page click Add Service Event Scheduling Notice and then fill out the fields:
- Notification Type (required):
Select the notification type you want to create
- Send Empty (required):
Should this notice be sent even if there is no QC to currently notify about?
- Recurrences (required):
Create a recurrence rule to define the days you want this notice sent.
- Time of day (required):
Select the time of day you want the notice sent.
- Future Days:
Select the number of days for which you want to include upcoming due dates for QC. For example, to get a notification containing QC coming due in the next week, set future days to 7.
- Recipients (required):
Select the recipient group you want this notification sent to.
- Unit Group filter (optional):
If you want this notification to only pertain to specific units, select a Unit Group filter.
Click Save once you have configured the notification the way you want.
Service Event Review Notices
Service Event Review notices allow users to be alerted when Service Events are awaiting review. There is currently one Service Event Review Notification subtypes:
Notify about Service Events awaiting review This is a scheduled notification that can be sent to remind staff that there are Service Events awaiting review.
To create a new Service Event Review Notice click through the Service Event Review Notices section of the Notification admin section and then on the next page click Add Service Event Review Notice and then fill out the fields:
- Notification Type (required):
Select the notification type you want to create
- Send Empty (required):
Should this notice be sent even if there are no Service Events to currently notify about?
- Recurrences (required):
Create a recurrence rule to define the days you want this notice sent.
- Time of day (required):
Select the time of day you want the notice sent.
- Recipients (required):
Select the recipient group you want this notification sent to.
- Unit Group filter (optional):
If you want this notification to only pertain to specific units, select a Unit Group filter.
Click Save once you have configured the notification the way you want.
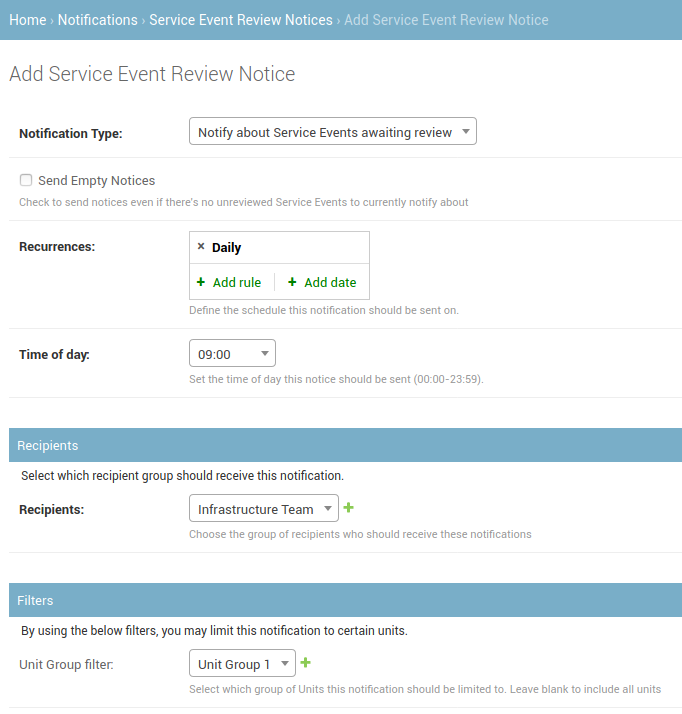
Filling out the fields for a Service Event Review notice.
Part Notices
There is currently one Part notice type:
Notify when inventory for a part falls below it’s Low Inventory threshold Use these alerts to get an email whenever the number of parts fall below its low inventory threshold.
To create a new Part Notice click through the Part Notices section of the Notification admin section and then on the next page click Add Part Notice and then fill out the fields:
- Notification Type (required):
Select the notification type you want to create
- Recipients (required):
Select the recipient group you want this notification sent to.
- Part Category Group filter (optional):
If you want this notification to only pertain to specific part categories, select a Part Category Group filter.
Click Save once you have configured the notification the way you want.
Fault Logged Notices
There is currently one Fault Logged notice type:
Notify when fault logged Use these alerts to get an email whenever a user logs a fault.
To create a new Fault Logged Notice click through the Fault Logged Notices section of the Notification admin section and then on the next page click Add Fault Logged Notice and then fill out the fields:
- Notification Type (required):
Select the notification type you want to create
- Recipients (required):
Select the recipient group you want this notification sent to.
- Unit Group filter (optional):
If you want this notification to only pertain to specific units, select a Unit Group filter.
Click Save once you have configured the notification the way you want.
Fault Review Notices
There is currently only one subtype of Fault Review Notice:
Notify about Faults awaiting review: This is a scheduled notification that can be sent to remind staff that there are currently logged Faults awaiting review.
To create a new Fault Review Notice click through the Fault Review Notices section of the Notification admin section and then on the next page click Add Fault Review Notice and then fill out the fields:
- Notification Type (required):
Select the notification type you want to create
- Send Empty (required):
Should this notice be sent even if there are no Faults to currently notify about?
- Recurrences (required):
Create a recurrence rule to define the days you want this notice sent.
- Time of day (required):
Select the time of day you want the notice sent.
- Recipients (required):
Select the recipient group you want this notification sent to.
- Unit Group filter (optional):
If you want this notification to only pertain to specific units, select a Unit Group filter.
Click Save once you have configured the notification the way you want.
Editing a Notification
In order to edit any notification, locate it in the admin section:
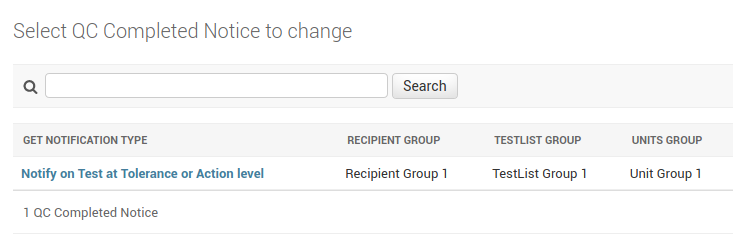
Find the notification you want to edit.
click through the link, make the changes you want and then click Save
Deleting a Notification
In order to delete any notification, locate it in the admin section (as shown above in Editing a Notification), click through the link, click Delete:

Notification delete button
and then click Yes, I’m Sure:
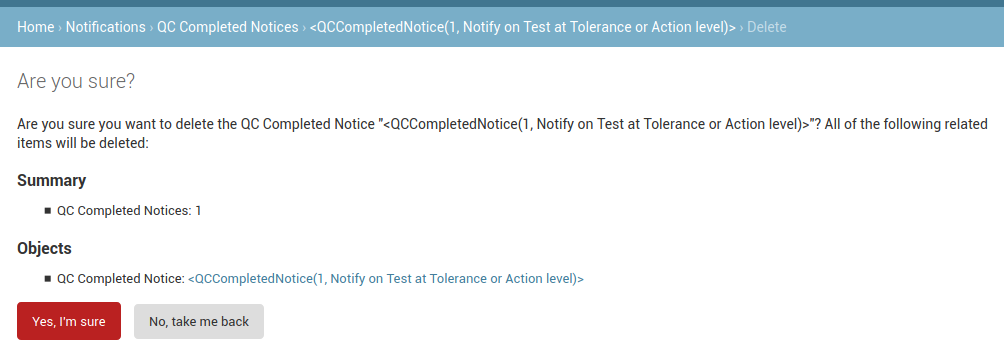
Notification delete confirmation button