Installing & Deploying QATrack+ with Docker
Warning
This is a developmental install method. It is quite simple to get up and running but has not been battle tested in production yet!
Prerequisites by OS
This has been tested under two setups, Ubuntu 18.04, or Windows 10. Depending on which system you are using there are different ways to install the required dependencies. Follow the section that applies to your specific machine.
Windows 10 Professional or Enterprise with Hyper-V
The aim of this setup is to have a complete installation of QATrack+ on a Windows 10 Professional or Enterprise machine with the backups being scheduled to be periodically copied to a OneDrive directory.
Ensure Virtualisation is enabled
This setup uses Hyper-V. To use Hyper-V you need Windows 10 Professional or Enterprise with virtualisation enabled. To verify that virtualisation is enabled open the task manager, select More details, click on the Performance tab and verify that in the bottom right it states Virtualisation: Enabled as in the following screenshot:

Virtualisation enabled
If this says disabled then this will need to be enabled within your machines BIOS before continuing.
See https://docs.docker.com/docker-for-windows/troubleshoot/#virtualization for further troubleshooting if required.
Chocolatey
To simplify this guide all installation will be done via the chocolatey package manager. To install chocoletey run the following in a command prompt with administrative privileges.
@"%SystemRoot%\System32\WindowsPowerShell\v1.0\powershell.exe" -NoProfile -InputFormat None -ExecutionPolicy Bypass -Command "iex ((New-Object System.Net.WebClient).DownloadString('https://chocolatey.org/install.ps1'))" && SET "PATH=%PATH%;%ALLUSERSPROFILE%\chocolatey\bin"
For more information on chocolatey see https://chocolatey.org/
Docker for Windows, and Git
To install Docker for Windows, Docker Compose and Git run the following within and administrative command prompt:
choco install git docker-for-windows -y
Reboot your machine.
Run the newly created Docker for Windows icon that has appeared on the desktop. If prompted to approve the request to enable Hyper-V. Thise will once again reboot your computer. Depending on your user priveledges you may need to add your user account to docker-users (https://github.com/docker/for-win/issues/868#issuecomment-352279510) at this point.
You should not need to click this icon again.
After multiple reboots Docker will begin downloading and setting up its virtual machine. This will take some time and you may notice the PC running slow while it is working on this.
Specifically you are waiting until the following popup is displayed:

Docker Welcome
On my machine this docker initialisation process took a little over 15 minutes.
To test that docker is working as expected run the following in a command prompt:
docker run hello-world
Ubuntu 18.04
If your PC is running Ubuntu 18.04 follow these steps to install the required prerequisites.
Docker and Docker-Compose
To run this installation method you will need both docker-ce and docker-compose on your system. When running Ubuntu 18.04 do this by running the following commands:
sudo apt update
sudo apt upgrade
sudo snap install docker

sudo apt install python3-venv
python3 -m venv ~/.docker-compose
source ~/.docker-compose/bin/activate
pip install --upgrade pip
pip install docker-compose
Each time before using the docker-compose command you will need to repeat the above command of source ~/.docker-compose/bin/activate.
On other systems you can follow the instructions found at the following locations:
Make docker work without sudo on Linux
You will also need to implement the following to be able to run docker without sudo:
After completing these post install tasks please reset your computer.
Before continuing please verify that you can run docker run hello-world in a terminal.
Git
To retrieve files from bitbucket you will need git installed by running the following:
sudo apt install git
On other systems follow the instructions at https://www.atlassian.com/git/tutorials/install-git.
Installing QATrack+
This part is OS independent. The language used will be tuned for a Windows 10 user, but equivalent steps can be followed on Ubuntu.
Changing to the directory where all server files will be stored
Open a command prompt with just user priveledges and change your directory to the directory where all of the QATrack+ server files will be stored.
Lets say, for example, all our files are going to be located within the D: drive at D:QATrack+ then we would want to do the following:
D:
cd QATrack+
Downloading
At this point QATrack plus files need to be pulled from the git repository. Do the following:
git clone https://bitbucket.org/tohccmedphys/qatrackplus.git
cd qatrackplus
Installation
To run any docker-compose commands you need to be within the qatrackplus\deploy\docker directory. So lets change to there now:
cd deploy\docker
To build and start the server run the following:
docker-compose build
docker-compose up
On initial run this will take quite some time to load.
Wait until you see something like the following within your terminal:
qatrack-django_1    | [2018-07-07 15:31:44 +0000] [509] [INFO] Starting gunicorn 19.3.0
qatrack-django_1    | [2018-07-07 15:31:44 +0000] [509] [INFO] Listening at: http://0.0.0.0:8000 (509)
qatrack-django_1    | [2018-07-07 15:31:44 +0000] [509] [INFO] Using worker: sync
qatrack-django_1    | [2018-07-07 15:31:44 +0000] [512] [INFO] Booting worker with pid: 512
qatrack-django_1    | [2018-07-07 15:31:44 +0000] [514] [INFO] Booting worker with pid: 514
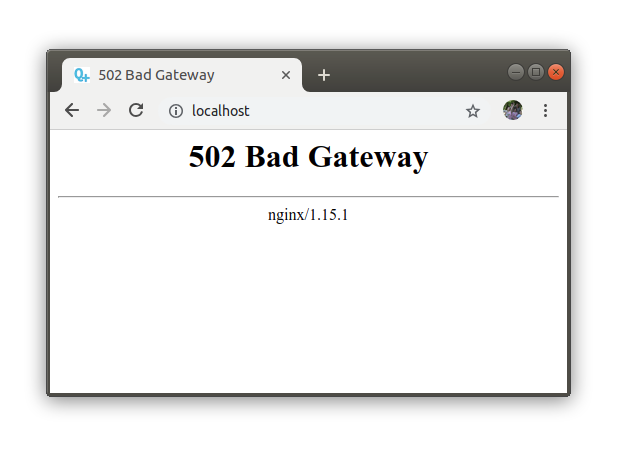
Once the Listening at: http://0.0.0.0:8000 line is visible go to http://localhost in your computer’s browser to see the server.
If you go to the website too early you will see the following error. This is not an issue, it just means that the QATrack+ server has not yet finished initialising. The first time QATrack+ starts up initialisation can take about 10 minutes depending on your internet connection.
Default login is username admin, password admin. Once you have logged in as admin go to http://localhost/admin/auth/user/2/password/ to change the admin password to something more secure.
Setting up copying backups from local machine to remote server on Windows
Create the following bat file:
NET USE V: "\\pdc\OneDrive$\QATrack+"

xcopy D:\QATrack+\qatrackplus\deploy\docker\user-data\backup-management\backups V:\backups /E /G /H /D /Y
Then using Windows Task scheduler to set that bat file to run daily.
Advanced usage tips
Accessing the Django shell
If you need to access the Django shell run the following in another terminal:
docker exec -ti docker_qatrack-django_1 /bin/bash
source deploy/docker/user-data/python-virtualenv/bin/activate
python manage.py shell
This requires that the containers are already running.
Making QATrack+ start on boot and run in the background
To have QATrack+ start on boot run the following command:
docker-compose up -d
Setting up SSL
To set up SSL I highly recommending using CloudFlare’s free ‘one-click ssl’ which will set up SSL security between your users and CloudFlare: https://www.cloudflare.com/ssl/
To also secure the path between CloudFlare and your server you will need to follow the following steps: https://support.cloudflare.com/hc/en-us/articles/217471977
The nginx.conf file referred to by that guide is contained within this directory. Place the certificate files within user-data/ssl then they will be available at /root/ssl/your_certificate.pem and /root/ssl/your_key.key on the server.
To reset the server and use your updated nginx.conf file run:
docker-compose stop
docker-compose up
Changing from port 80 to a different port
The first number of the ports item within docker-compose.yml can be changed to use a port that is different to port 80. For example, if 80:80 was changed to 8080:80 then you would need to type http://localhost:8080 within your browser to see QATrack+. After editing docker-compose.yml you need to rerun docker-compose up.
Shutdown the server
To shutdown the server run:
docker-compose stop
You can also single press Ctrl + C within the server terminal that you ran docker-compose up to gracefully shutdown the server.
Update server
To update the server from bitbucket run:
docker-compose stop
git pull
Once any files have changed in the qatrackplus directory you need to run the following:
docker-compose build
docker-compose up
Backup management
Everytime docker-compose up is run a timestamped backup zip file of the database, uploaded files, and your site specific css is created. These backups are stored within qatrackplus/deploy/docker/user-data/backup-management/backups. To restore a backup zip file copy it to the restore directory found at qatrackplus/deploy/docker/user-data/backup-management/restore. The restoration will occur next time docker-compose up is called. After successful restoration the zip file within the restore directory is deleted.
This restore method will also successfully restore backup files created on a different machine. However it will only successfully restore a like for like QATrack+ version. This cannot be used when upgrading between versions.
Delete docker data
If for some reason you need it, the following command will delete all docker data from all docker projects (WARNING, IRREVERSABLE):
docker stop $(docker ps -a -q) && docker rm $(docker ps -a -q)
And this will delete all of the cache:
echo 'y' | docker volume prune
To just delete all postgres database data do the following:
docker stop docker_qatrack-postgres_1 && docker rm docker_qatrack-postgres_1 && docker volume rm docker_qatrack-postgres-volume