Installing & Deploying QATrack+ with Docker
This page covers running QATrack+ with Docker Compose: setting it up, configuring it, looking after its data and backups, running it day to day, and developing QATrack+ with it. If you are upgrading a Docker site from QATrack+ 4.0.0 or 4.0.1, start with Upgrading a Docker 4.0.0 installation to 4.0.1.
Setting up QATrack+
Docker installations are supported on Ubuntu 24.04 LTS, and the instructions have also been tested on Ubuntu 22.04 LTS, the same releases as the Linux installation guide. Other Linux distributions work too, as long as they can run the Docker versions below. Work through this section once, in order, on the server that will host QATrack+.
Use a regular user account rather than root, as the Linux
installation guide does. A newly created server often gives
you nothing but root; if that is where you are, make an account now and use
it for everything that follows. adduser asks for a password and then some
optional details you can skip with Enter:
adduser qatrack
usermod -aG sudo qatrack
su - qatrack
Any user name works – qatrack is only this guide’s example.
Minimum Docker versions
QATrack+ needs:
Docker Compose 2.17 or newer. QATrack+’s
compose.yamlpasses your own Python packages to the build in a way older Compose releases don’t understand. With one of them, the commands that build or create containers (up,build,run,createandpull), as well asconfig, stop with:services.django.build Additional property additional_contexts is not allowed
Containers that are already running carry on. Every other
docker composecommand stops with the same error too,ps,logs,exec,stop,start,restartanddownincluded, unless you name the project with-p qatrackplus: for example,docker compose -p qatrackplus stop. (If your.envsetsCOMPOSE_PROJECT_NAME, they work without it.) What you can’t do at all is build or start a new release, or create containers again afterdocker compose down, until Docker is updated.Docker Engine 23.0 or newer. The image build relies on BuildKit features that Docker Engine 20.10 and earlier don’t include.
If Docker is already installed on this server, check what you have with:
docker compose version
docker version --format '{{.Server.Version}}'
The first prints the Compose version (for example Docker Compose version
v2.27.0) and the second the Engine version. If either is too old, update
Docker by following Docker’s own instructions linked below (on Ubuntu, Docker’s
apt repository updates both the Engine and the docker-compose-plugin
package). Docker’s current releases are well above both minimums.
If Docker is not installed yet, these commands do not exist yet either: carry on to the next section, which installs Docker and then checks both versions.
Installing Docker and Git
If your server runs Ubuntu 24.04 LTS (or 22.04 LTS), follow these steps to install the required prerequisites.
Docker Engine and Docker Compose
To run this installation method you need Docker Engine with the Docker Compose
plugin, which provides the docker compose command. Install both by following
Docker’s instructions for your distribution:
That page offers several methods: use the apt repository, the first one, which
is the one that keeps Docker updated with the rest of the server. The convenience
script and the manual .deb download both work, but neither gives you updates.
Both versions are checked once the next step lets your own user talk to the Docker daemon.
Running Docker without sudo
So that your own user can run docker commands without sudo, follow
Docker’s post-installation steps for Linux, which add your
user to the docker group. Only the first part of that page applies here: add
the group and your user to it, then stop. Its first command,
sudo groupadd docker, will say group 'docker' already exists - the
Docker packages created it when you installed them, and that message means there
is nothing to do, not that something went wrong.
Log out and back in (or restart the server) for the change to take effect.
Until you do, docker commands fail with permission denied while trying to
connect to the Docker daemon socket, in the same session where you have just
added yourself to the group: group membership is read when you log in.
Being in the docker group is as good as being root on the server, so add
only people you would trust with root.
Before continuing please verify that you can run docker run hello-world in a
terminal.
Then check that Compose is available and that both meet the minimum versions (Compose 2.17, Engine 23.0):
docker compose version
docker version --format '{{.Server.Version}}'
The second command needs the docker group membership you just added, which
is why it comes after this step rather than before it.
Git
To retrieve files from github you will need git installed by running the following:
sudo apt install git
Many server images have git already. apt then either reports it is already
the newest version, or offers to upgrade it and waits for you to answer
[Y/n]; either is fine.
On other systems follow the instructions at https://www.atlassian.com/git/tutorials/install-git.
Getting the QATrack+ code
As your own user (not root), choose a folder to keep QATrack+ in. This guide
uses ~/web, as the Linux installation guide does,
and fetches QATrack+ from its git repository into it:
mkdir -p ~/web
cd ~/web
git clone https://github.com/qatrackplus/qatrackplus.git
cd qatrackplus
git checkout releases/4.0
The releases/4.0 branch is the 4.0 series including its patch releases, so
updating later is a git pull: you never name a
version. A git pull brings in the fixes for 4.0 but never moves you on to
the next major version, so that upgrade only happens when you choose to make it.
Creating your settings file
To run any docker compose commands you need to be within the
qatrackplus/deploy/docker directory. So let’s change to there now:
cd deploy/docker
All of QATrack+’s Docker settings live in a file called .env in this
directory. It holds your passwords, so it is never part of the QATrack+
repository: create it from the documented template, then open it in a text
editor:
cp .env.example .env
chmod 600 .env
nano .env
chmod 600 is not decoration: .env holds your database password and, later,
your secret key, and cp gives it whatever your account’s default permissions
are - on Ubuntu that is readable by every account on the server. Docker Compose
reads the file as you, before any container starts, so restricting it costs
nothing. Measured on a fresh Ubuntu 24.04 server: the copy arrives as mode 664.
Any editor will do. nano is used here because Ubuntu installs it and its
commands are listed along the bottom of the screen: Ctrl-o then Enter
writes the file, and Ctrl-x leaves it.
Warning
The values in the template are placeholders, not defaults to leave alone.
As shipped it sets a database user of change_me, a database password of
change_me_strong_password, and ALLOWED_HOSTS=*, which accepts requests
for any host name. Change all three before anyone else can reach this server.
At minimum, set:
POSTGRES_USERandPOSTGRES_PASSWORD, before the first start. The database is created with them.ALLOWED_HOSTS, the host names or IP addresses people use to reach QATrack+, comma-separated. nginx answers only these names, and drops requests for any other host before they reach QATrack+. The first name in the list is also used for the links in QATrack+’s emails and reports, unless you setSITE_DOMAIN.Put in every name and address people will actually type. A request for a host that is not in the list gets no answer at all - not an error page, not a redirect; the connection simply returns nothing. So if you list only
qatrack.myclinic.caand then try the server’s bare IP address, the browser reports that the site cannot be reached, which looks exactly like QATrack+ being down when it is in fact running normally. Add the IP address too if anyone uses it.
Starting QATrack+ for the first time
To build QATrack+ and start it in the background, run the following:
docker compose build
docker compose up -d
On initial run this will take quite some time to load. docker compose build
builds the image, and docker compose up -d then waits for django to
report itself healthy before it starts nginx and django-q and returns
you to the prompt, so expect it to sit there for a while without printing
anything.
Once it returns, check that the services are actually up:
docker compose ps -a
nginx, django, django-q, postgres and backup should all read
Up and (healthy) - Compose writes Up 2 minutes, not the word running -
while init has done its work and shows Exited (0). Run this a minute
after up -d returns, not the moment it does. up -d finishes as soon
as the containers are started, which is before their health checks have passed:
on a freshly built server django-q and nginx both read
Up Less than a second (health: starting) at that moment, and were
(healthy) about forty-five seconds later. (health: starting) is not a
problem to solve, it is a check that has not finished yet. The -a is what shows you init: without it, docker compose
ps lists only running containers, so the one line this step tells you to look
for is the one line missing from the output. A
service that is missing or restarting has its reason in its own log, and
up -d does not always report one – if another program on the server is
already using port 80 or 443, for example, nginx cannot start and up -d
still finishes without an error.
To see what django did while it started, run:
docker compose logs django
You are looking for something like the following at the end (the dates, numbers and version will differ):
django-1  | [2026-05-04 15:31:44 +0000] [1] [INFO] Starting gunicorn 26.0.0
django-1  | [2026-05-04 15:31:44 +0000] [1] [INFO] Listening at: http://0.0.0.0:8000 (1)
django-1  | [2026-05-04 15:31:44 +0000] [1] [INFO] Using worker: sync
django-1  | [2026-05-04 15:31:44 +0000] [7] [INFO] Booting worker with pid: 7
django-1  | [2026-05-04 15:31:44 +0000] [8] [INFO] Booting worker with pid: 8
Before that line, the first start also prints a WARNINGS: block saying that
the cache table qatrack_cache_table is missing. On a first start that is
expected and resolves itself: system checks run before the migrations, and the
migration that creates the table has not run yet. It does not appear again once
the stack is up. Nothing needs to be done about it. If it is still reported after
the stack has finished starting, run docker compose exec django python
manage.py check and follow the hint it prints.
Once the Listening at: http://0.0.0.0:8000 line is visible, open one of the
names you set in ALLOWED_HOSTS in a browser, for example
http://qatrack.myclinic.ca. On the server itself, http://localhost works
too.
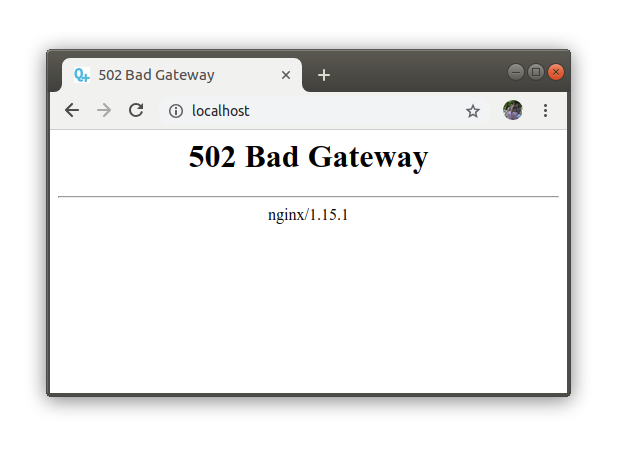
If you go to the website too early you will see the following error. This
is not an issue, it just means that the QATrack+ server has not yet finished
initialising. How long that takes depends on the machine and the connection: on
a 2 vCPU / 4 GB server the build took three and a half minutes and the start
about a minute and a half, with no 502 at all, while a slower machine or a
slower connection can take several minutes more. The django service is
allowed up to ten minutes for its first start before Compose gives up on it.
Note
The web server (nginx) and the background task service (django-q)
only start once the django service reports that it is ready, and
django is given up to 10 minutes for its first start. On a slow machine
this may still not be enough, and docker compose up stops with
dependency failed to start: container qatrackplus-django-1 is unhealthy.
Nothing is broken: django keeps working through its database migrations.
Wait until docker compose logs django shows the Listening at line,
then run docker compose up -d to start the rest. Migrations that have
already run are not repeated.
Creating your first user
No user account is created for you, so create one before your first login.
The django service runs the application, so run createsuperuser there and
answer its prompts:
docker compose exec django python manage.py createsuperuser
You can then sign in with the credentials you just chose. Next, look through Configuring QATrack+ for anything else your site needs, such as HTTPS or email, and set up copies of your backups off the server.
Configuring QATrack+
QATrack+’s Docker settings all live in deploy/docker/.env, which you created
from .env.example when setting up. Apart from the
database user name and password and ALLOWED_HOSTS, everything is optional
and documented in .env.example: email, time zone, HTTPS, Active Directory /
LDAP sign-in (see Signing in with Active Directory over LDAPS for an encrypted connection), and the QC
display options. Leave a setting commented out to keep its default.
SECRET_KEY is generated and kept for you if you do not set one, but it is
not in the nightly backup; see Keeping the secret key safe. After changing
.env, apply it with docker compose up -d.
The settings have the same names as on any other QATrack+ installation, where
they go in local_settings.py instead; Configuring a QATrack+ Installation explains what
each one does.
Host names and the site’s address
ALLOWED_HOSTS, which you set when setting up, lists
the names people use to reach QATrack+. The links in QATrack+’s emails and
reports use the site’s domain instead. If SITE_DOMAIN is not set, QATrack+
fills that domain in from the first name in ALLOWED_HOSTS, once, while it is
still Django’s default (example.com); after that you can change it in the
admin’s Websites page. If people reach QATrack+ on a port other than 80 (or 443 with HTTPS), set
SITE_DOMAIN to the name with the port, e.g. qatrack.myclinic.ca:8080, so
links in emails work. SITE_NAME sets the name shown at the top of each page.
Both are applied every time QATrack+ starts, and replace any change made to them
in the admin’s Websites page; leave them unset to manage them there instead.
Changing from port 80 to a different port
The first number of each item under ports in the nginx service of
compose.yaml is the port on the server. For example, if "80:80" was
changed to "8080:80" then you would need to type
http://qatrack.myclinic.ca:8080 within your browser to see QATrack+ (and the
same for "443:443" with HTTPS). Set SITE_DOMAIN with the port too, as
described above. After editing compose.yaml, apply it with
docker compose up -d.
compose.yaml comes with QATrack+, so this is a change of your own to one of
its files. If a later git pull stops with Your local changes to the
following files would be overwritten, keep your change with git stash, as
the Docker upgrade guide shows.
Email, sign-in and other settings
Each of these has its own part of .env.example: uncomment the settings you
need and fill them in.
Email, for notifications and scheduled reports: the
EMAIL_*settings. See Configuring Email for QATrack+.Active Directory / LDAP sign-in: put
qatrack.accounts.backends.ActiveDirectoryGroupMembershipSSLBackendfirst inAUTHENTICATION_BACKENDSand fill in theAD_*settings. See Active Directory and Active Directory Settings. For an encrypted (LDAPS) connection to the directory, see Signing in with Active Directory over LDAPS.Time zone, language and the QC display options: see Configuring a QATrack+ Installation.
Serving QATrack+ over HTTPS
nginx serves QATrack+ over HTTPS with your certificate. You need a certificate for the host name people use, and its private key, in PEM format: from your hospital’s IT department, a certificate authority, or an origin certificate from a proxy such as Cloudflare.
Put them in
deploy/docker/user-data/sslascert.pemandkey.pem. Docker creates that folder, owned by root, the first time QATrack+ starts, so copy them in withsudo:cd ~/web/qatrackplus/deploy/docker sudo mkdir -p user-data/ssl sudo cp /path/to/your/certificate.pem user-data/ssl/cert.pem sudo cp /path/to/your/private.key user-data/ssl/key.pem sudo chmod 600 user-data/ssl/key.pem
The certificate file should hold the full chain: your certificate first, then any intermediate certificates. To use other file names, set
NGINX_SSL_CERTIFICATEandNGINX_SSL_CERTIFICATE_KEYin.env.In
deploy/docker/.env, setHTTP_OR_HTTPS=https, and setALLOWED_HOSTSto the name on the certificate.Apply the change:
docker compose up -d
nginx now listens on port 443 and redirects HTTP to HTTPS, and QATrack+ marks its
cookies secure. If nginx cannot read the certificate or key, it stops, and
docker compose logs nginx says which file is missing. To renew the
certificate, replace the files and run docker compose restart nginx.
If a proxy in front of QATrack+ (a load balancer, or Cloudflare’s Flexible
mode) handles HTTPS and forwards plain HTTP to it, leave HTTP_OR_HTTPS=http.
With https, nginx would redirect the proxy’s HTTP requests back to HTTPS, and
the browser would loop between the two.
Signing in with Active Directory over LDAPS
QATrack+ can let people sign in with their usual network user name and password,
by checking them with your Active Directory (see Active Directory; the
AD_ settings in .env.example set it up). With AD_LDAP_PROTOCOL=ldaps
and AD_LDAP_PORT=636, the connection to the directory is encrypted, and
QATrack+ checks the directory server’s certificate before it sends anyone’s
password, much as a web browser checks a website’s.
To check that certificate, QATrack+ has to trust the certificate authority (CA) that issued it:
A public CA, the kind that issues website certificates: there is nothing to do. QATrack+ trusts the same public CAs as the operating system in its container. Leave
AD_CERT_FILEunset.Your organization’s own CA, which is what most hospital directory servers use: QATrack+ needs a copy of that CA’s certificate. Ask your IT department for the root CA certificate, plus any intermediate CA certificates, in PEM format. With
AD_CERT_FILEset, QATrack+ trusts only the CAs in that file, not the public ones, so set it only for a directory that uses your own CA.
A CA certificate is public, not secret: it holds no private key, and it is safe to copy and email.
To add your CA, run these in deploy/docker:
Make sure the file is in PEM format: a text file starting with
-----BEGIN CERTIFICATE-----. A.cerfile exported from Windows is often in DER (binary) format instead; convert it with:openssl x509 -inform der -in ca.cer -out ca.pemIf you were given a root and an intermediate certificate, convert each one, then put them one after the other in a single file:
cat root.pem intermediate.pem > ca.pem. A file with only the root works only if the directory server sends its intermediate certificate when QATrack+ connects, and not every server does. If you’re not sure, include the root and every intermediate in the one file; it does no harm.Copy it into
user-data/ldap. Docker creates that folder, owned by root, the first time QATrack+ starts, so usesudo. This also makes the file readable by QATrack+:sudo install -D -m 644 ca.pem user-data/ldap/ca.pemIn
.env, set:AD_LDAP_PROTOCOL=ldaps AD_LDAP_PORT=636 AD_DNS_NAME=ad.myclinic.ca AD_CERT_FILE=/etc/qatrack/ldap/ca.pem
/etc/qatrack/ldapis where thedjangoanddjango-qcontainers see the server’sdeploy/docker/user-data/ldapfolder, soAD_CERT_FILEalways uses that path, not the folder’s path on the server. Onlydjangosigns people in;django-qsees the file too so that its startup check finds it and doesn’t warn that it is missing.Apply the change:
docker compose up -d
The name must match the certificate. AD_DNS_NAME must be a name written
on the directory server’s certificate, such as ad.myclinic.ca: not its IP
address, and not a short name the certificate doesn’t list. To see the names on
the certificate, run this on the server:
openssl s_client -connect ad.myclinic.ca:636 </dev/null 2>/dev/null | openssl x509 -noout -subject -ext subjectAltName
Check that it works. This connects to your directory the way sign-in does,
and prints OK, or FAILED: and the reason:
docker compose exec django python manage.py shell -c "import sys, ldap; from django.conf import settings; from qatrack.accounts.backends import ActiveDirectoryGroupMembershipSSLBackend as AD; sys.excepthook = lambda *e: print('FAILED:', e[1]); AD(); ldap.initialize(settings.AD_LDAP_URL).simple_bind_s('', ''); print('OK')"
A missing or unreadable CA file, a DER file, a certificate from a CA you have
not added, or a name that doesn’t match all fail the same way, as
Can't contact LDAP server; QATrack+’s auth.log says Unable to contact
LDAP server. When the file itself is the problem, docker compose logs django
also shows a warning saying what is wrong with it each time QATrack+ starts.
Local QATrack+ accounts keep working while you fix it.
Warning
Advice on the internet often suggests TLS_REQCERT never (or
LDAPTLS_REQCERT=never) to make this error go away. Never use it: it
turns off the certificate check, so QATrack+ would send people’s passwords to
anything that answers on that name. Fix the CA file or the name instead.
When IT renews the directory server’s certificate from the same CA, there is
nothing to do. If the CA itself changes, replace user-data/ldap/ca.pem the
same way and run docker compose restart django django-q. The nightly backup
does not include user-data/ldap, so keep a copy of the CA file with your
settings (see Backing up and restoring).
Keeping the secret key safe
QATrack+ signs everyone’s sign-in sessions and password-reset links with a
secret key. If SECRET_KEY is not set in .env, QATrack+ generates a key
the first time it starts and saves it in the user-data-volume Docker volume
(or the folder QATRACK_USER_DATA_DIR names; see Keeping QATrack+’s data in folders on the server),
as deploy/docker/user-data/secret_key.txt inside the containers (the
deploy/docker/user-data folder on the server holds only your HTTPS and LDAPS
certificates). The key is kept when the containers are rebuilt or upgraded, and
each time QATrack+ starts, docker compose logs django shows a notice saying
where it is.
That volume is not part of the nightly backup. If it is lost, for example with
docker compose down -v, or QATrack+ is moved to another server without it,
QATrack+ generates a new key: everyone is signed out once, and password-reset
links already sent stop working. Your QC records are not affected.
The simplest way to keep the key safe is to copy it into .env, with the rest
of your settings. Run this in deploy/docker while QATrack+ is running, then
apply it:
printf '\nSECRET_KEY=%s\n' "$(docker compose exec -T django cat deploy/docker/user-data/secret_key.txt)" >> .env
docker compose up -d
The key is the same one, so nobody is signed out, and the notice no longer
appears in the log. From then on, .env holds the key that signs your users’
sessions: keep it as private as your database password, and keep a copy with
your backups.
To choose your own key instead, set SECRET_KEY in .env before QATrack+
first starts. This prints a suitable one:
docker compose run --rm --no-deps django python -c "import secrets; print(secrets.token_urlsafe(50))"
Avoid keys containing $, such as those made by Django’s
get_random_secret_key: Docker Compose reads $ in .env as the start
of a variable and changes the key. Its warning names only the part of the key
after the $, not SECRET_KEY, so it is easy to miss. If your key already
has a $ in it, put the key in single quotes, which keeps it exactly as it is:
SECRET_KEY='...'. Changing the key of a site already in use signs everyone
out once.
If you are upgrading from QATrack+ 4.0.0 or 4.0.1, which kept the key in a different place, see Keep your users signed in (optional).
Adding Python packages
Calculation procedures can import Python packages that QATrack+ does not
include. QATrack+ already includes numpy, scipy, pandas, matplotlib, pydicom,
pylinac and others; the versions it uses are in uv.lock at the top of your
QATrack+ folder. To add another package, list it in
deploy/docker/site-requirements/requirements.txt, one per line, with its
version:
pint==0.24.4
Then rebuild the image and restart:
docker compose build
docker compose up -d
The packages are installed alongside QATrack+’s own, at versions that work with
them. If a package needs a different version of something QATrack+ uses (Django
or numpy, for example), docker compose build stops and names the conflict,
and your running QATrack+ is left as it was. Choose a version of the package
that works with QATrack+’s, or ask on the QATrack+ mailing list.
requirements.txt and any wheel files beside it are yours: git ignores them,
so git pull leaves them alone.
Docker remembers the installed packages between builds and only installs them
again when something in deploy/docker/site-requirements or QATrack+’s own
dependencies changes. Packages that yours depend on, and that QATrack+ doesn’t
already include, are picked when they are installed, so a later rebuild can get
newer versions of them. If you need every rebuild to be identical, pin those in
requirements.txt too, or use wheel files as below. To install everything
afresh, run docker compose build --no-cache django.
On a server without internet access, use wheel (.whl) files. They must suit
the image rather than the computer you download them on: Linux, CPython 3.12 and
the server’s processor (x86_64 on most servers; aarch64 on ARM). On any
computer with internet access and Python, pip can fetch the right ones, along
with everything they depend on:
pip download --only-binary=:all: --python-version 3.12 --implementation cp --platform manylinux2014_x86_64 --platform manylinux_2_28_x86_64 -d site-wheels pint==0.24.4
Copy everything in site-wheels into deploy/docker/site-requirements (any
copies of packages QATrack+ already has do no harm), and add a line
--no-index at the top of requirements.txt so your packages come only from
those files. If pip finds no wheel for a package, it needs building from source;
ask on the mailing list.
The rest of the build still needs the internet, to download the Python base
image and QATrack+’s own packages. Build the image once while the server is
connected, so Docker has those steps saved; or build it on a connected computer
and move the finished image with docker save and docker load.
Connecting to the database directly
Out of the box, QATrack+’s PostgreSQL database isn’t published on any of the server’s network addresses, so there is nothing for other computers on your network to connect to. Most sites never need to change that.
That doesn’t make it unreachable from the server itself. On Linux, the server
can reach Docker’s internal network directly, so anyone with an account on the
server who knows the database password can connect. Whether or not you turn on
the option below, it’s POSTGRES_PASSWORD in .env that protects the
database, so make it long and hard to guess, and don’t reuse it anywhere else.
For a quick look, you don’t need to change anything. This opens psql inside
the database container (replace POSTGRES_USER and POSTGRES_DB with the
values in your .env):
docker compose exec postgres psql -U POSTGRES_USER -d POSTGRES_DB
If a database client, a GUI tool such as pgAdmin, or a reporting tool needs to
connect, you can publish the database on the server with the optional
compose.db-port.yaml file. It stays off until you turn it on.
To turn it on, add this line to .env (it is in .env.example,
commented out):
COMPOSE_FILE=compose.yaml:compose.db-port.yaml
then apply it:
docker compose up -d
COMPOSE_FILE tells every docker compose command run in
deploy/docker to use compose.db-port.yaml as well as compose.yaml,
so the commands you run don’t change, and it carries on across restarts and
upgrades.
PostgreSQL then listens on 127.0.0.1, port 5434: on the server itself
only, on a port that doesn’t clash with a PostgreSQL that may already be
installed there. To use another port, set POSTGRES_HOST_PORT in .env.
POSTGRES_HOST_ADDRESS sets the address, and should stay 127.0.0.1 (see
the warning below). These are not the same as POSTGRES_HOST and
POSTGRES_PORT, which tell QATrack+ how to reach the database inside Docker;
leave those alone.
Note
“The server itself only” needs Docker Engine 28.0 or newer. With older
releases, computers on the same network segment as the server (for example,
plugged into the same switch) can still reach a port published on
127.0.0.1. docker version shows the Engine version under Server.
If you can’t update Docker yet, ask your IT department to block port
5434 (or your POSTGRES_HOST_PORT) from the network at the server’s
firewall, or leave this turned off.
Turning it on or off restarts the whole site, not just the database. Every
QATrack+ service reads its settings from .env, so any change to .env
(this one included) makes docker compose up -d recreate the django,
django-q, backup and postgres containers. Expect QATrack+ to be
unavailable for about half a minute, with the browser showing a 502 Bad
Gateway page until it’s back. Do it at a quiet time, not while people are
saving QC results. To turn it off, remove the line (or put a # back in
front of it) and run docker compose up -d again.
If you use the development overlay, which is chosen
with -f, add the file to your -f options instead, for example
docker compose -f compose.yaml -f compose.dev.yaml -f compose.db-port.yaml up -d.
-f replaces COMPOSE_FILE rather than adding to it.
To connect on the server, use the user name, password and database name
from .env (POSTGRES_USER, POSTGRES_PASSWORD and POSTGRES_DB):
psql -h 127.0.0.1 -p 5434 -U POSTGRES_USER -d POSTGRES_DB
psql asks for the password. A GUI client takes the same host, port, user
name, password and database.
To connect from another computer, use an SSH tunnel rather than opening the
database to the network. This forwards port 5433 on your own computer, through
an SSH connection to the server, to the database (replace user@server with
your SSH login):
ssh -N -L 5433:127.0.0.1:5434 user@server
Leave it running, and point your client at 127.0.0.1, port 5433, on your
own computer. Only people who can sign in to the server over SSH can use the
tunnel, and the connection is encrypted all the way.
Warning
Do not set POSTGRES_HOST_ADDRESS=0.0.0.0. That opens the clinic’s QA
database to every network the server is connected to, protected only by the
database password. The connection isn’t encrypted, so that password and your
data would cross the network as plain text, and Docker opens the port even
past a firewall on the server such as ufw. Use an SSH tunnel instead. If
another system really must connect over the network, ask your IT department
to help limit who can reach it.
Data and backups
QATrack+’s records are its database and the files people upload. Out of the
box, both are kept in Docker volumes, along with QATrack+’s log files and the
secret key it generates, and the nightly backups go in the
deploy/docker/backups folder. Your settings (.env), HTTPS certificates
(user-data/ssl) and LDAPS CA certificate (user-data/ldap) are files in
deploy/docker, which you look after yourself. Keeping QATrack+’s data in folders on the server has a table of every location.
This section covers how QATrack+’s data is backed up and restored, and how to keep it in folders on the server instead of Docker volumes.
Backing up and restoring
The backup service backs up QATrack+’s database and uploaded files every
night at 4 AM, into the deploy/docker/backups folder (or the folder
QATRACK_BACKUPS_DIR names; see Keeping QATrack+’s data in folders on the server):
db_YYYYMMDD_HHMMSS.dump, the database;media_YYYYMMDD_HHMMSS.tar.gz, the uploaded files.
That is 4 AM in QATrack+’s time zone, TIME_ZONE in .env (America/Toronto if
it is not set), and the file names use the same local time;
docker compose logs backup shows the zone in use. No time zone changes its
clocks for daylight saving time at 4 AM, so the backup runs exactly once every
night, all year round.
Each file is read back in full as it is made, and only gets its final name once it is complete, so an interrupted backup never looks like a finished one. Each backup is kept for 7 days, then deleted. To back up now, or to see the backups you have, newest first:
docker compose exec backup backup
docker compose exec backup ls -lt /backups
A backup does not contain your .env file, which holds the database password
and your settings, nor the certificates in user-data/ssl and
user-data/ldap, nor your own Python packages in
deploy/docker/site-requirements (see Adding Python packages). Keep
copies of those as well. If you have not set
SECRET_KEY in .env, QATrack+ keeps a generated one in a Docker volume,
which a backup does not contain: restoring on
another server signs everyone out once and voids password-reset links.
Keeping the secret key safe shows how to copy it into .env, so it is kept with
your settings.
Keep copies off the server. deploy/docker/backups is on the same disk as
QATrack+, so a disk failure, or ransomware, that takes the server takes these
backups too. Have your IT department’s backup system copy that folder to another
machine every day. QATRACK_BACKUPS_DIR can also put the backups on a second
disk or a network share mounted on the server.
Only root can read the backups. They hold all of your clinic’s QATrack+
records and uploaded files, and everyone’s (hashed) passwords, so each backup
file is readable by root alone (mode 600) on the server. Each backup also does
the same to any backups made by earlier releases, which other users could read. To
copy them, use sudo (for example sudo cp or sudo rsync), or have the
copy job run as root, and keep the copies just as private. If the folder is on a
drive that cannot hold Linux permissions, such as an SMB/CIFS network share,
backup prints a warning but still makes the backup.
Note
Uploaded files are part of QATrack+’s records: an attachment belongs to the test list, service event or fault it was attached to, and nothing in QATrack+ deletes one. The folder only grows. Plan storage for it, and never point a clean-up job at it.
To restore, stop QATrack+, restore the database and the uploaded files from the same backup, and start it again:
docker compose stop django django-q
docker compose run --rm --no-deps backup restore-db db_YYYYMMDD_HHMMSS.dump
docker compose run --rm restore-media media_YYYYMMDD_HHMMSS.tar.gz
docker compose up -d
The backup service can only read the uploaded files, so that the nightly
backup can never change them. restore-media is a separate service, set up in
compose.yaml, that can write to them; it only runs when you ask for it, and
docker compose up never starts it. It uses the same image as backup, so
it is updated whenever backup is rebuilt.
Each command checks the whole backup before it changes anything, then asks you to
confirm: type the database name for restore-db, and RESTORE for
restore-media. Your current database and files are only replaced once the
backup has been fully unpacked beside them, so if a restore fails, or you stop it
with Ctrl-C, they are left as they were, and the command tells you so. A restore
replaces everything: anything entered since that backup is lost.
A restore stopped outright (a power cut, or docker kill) cannot tidy up
after itself. restore-db then says what it finds the next time it runs.
restore-media leaves a .restore.XXXXXX folder in the uploaded files,
whose previous folder may hold uploaded files from before that restore.
Those files are in no new backup, so each backup warns about the folder until
it is gone. To see what is in it:
docker compose run --rm --entrypoint ls restore-media -la /media /media/.restore.XXXXXX/previous
If you still want the backup’s files, run restore-media again to finish the
restore. If you want the files from before it instead, move what is in
previous back to the top of the uploaded files, in place of what is there.
Once nothing in the folder is needed, delete it:
docker compose run --rm --entrypoint rm restore-media -rf /media/.restore.XXXXXX
Backups made by QATrack+ 4.0.0 and 4.0.1 can be restored. When you restore a
backup from an older release, docker compose up -d applies the database
changes the current release needs. Do not restore a backup from a newer release
into an older one.
If you gave another PostgreSQL user access to QATrack+’s database (a read-only
user for a reporting tool, say; see Connecting to the database directly), the backup
holds that access but not the user itself. Restoring on a new server then
stops with role “…” does not exist, and nothing is changed. Create each such
user first (docker compose exec postgres createuser -U POSTGRES_USER
USERNAME), then run restore-db again.
Check the free disk space before you restore. restore-db builds the
restored database beside your current one, so while it runs PostgreSQL needs
room for a second copy of QATrack+’s database. To see how big the current one
is, replace POSTGRES_USER and POSTGRES_DB with the values in your
.env and run:
docker compose exec postgres psql -U POSTGRES_USER -d POSTGRES_DB -c "SELECT pg_size_pretty(pg_database_size(current_database()))"
To see how much space is free where PostgreSQL keeps its data, look at the Avail column of:
docker compose exec postgres df -h /var/lib/postgresql/data
On Linux this is the disk that holds Docker’s data, usually /var/lib/docker,
so df -h /var/lib/docker on the server tells you the same. A restored
database is often smaller than the one it replaces, but plan for at least the
size of the current one. restore-media likewise unpacks a second copy of the
uploaded files before it swaps them in; docker compose exec backup du -sh /media
shows how much room that needs.
Keeping QATrack+’s data in folders on the server
Out of the box, QATrack+ keeps its data in Docker volumes, which Docker stores
in its own folder (usually /var/lib/docker/volumes on Linux). That suits most
sites, and nothing needs to change. If you would rather keep some of it in a
folder on the server, for example one your IT department already backs up or
watches, you can, one location at a time:
What |
Kept by default in |
To use a folder, set in |
|---|---|---|
Uploaded files (attachments, test images) |
the |
|
The nightly backups |
the |
|
QATrack+’s log files |
the |
|
The generated secret key (see Keeping the secret key safe) |
the |
|
The database |
the |
(no setting) |
The web pages’ stylesheets and scripts |
the |
(no setting) |
The database stays in its volume. PostgreSQL’s own files can only be copied safely while it is stopped, and the nightly backup already puts a copy of the database in the backups folder, which you can move. The stylesheets and scripts are rebuilt every time QATrack+ starts, so there is nothing in them to keep.
Docker names each volume after the project, so on the server they are listed by
docker volume ls as qatrackplus_media-volume and so on.
Using a folder. Set the variable in .env to the folder’s full path, for
example QATRACK_MEDIA_DIR=/srv/qatrack/media, then run
docker compose up -d. Each setting is separate, so set only the ones you need;
.env.example describes each one.
Every service that uses that data (django, django-q, nginx, init,
backup and restore-media) follows the same setting. On a new site, set
them before the first start. On a site that is already in use, copy the data
across first, as shown below: set on its own, the variable starts QATrack+ with
an empty folder, and every uploaded file would seem to be missing.
Who owns the files. QATrack+ runs as user id 1000 and group id 1000, and must
be able to write to its folders. You do not need to set this up: Docker creates a
folder that does not exist yet, and each time QATrack+ starts, its init
service gives everything in the media, logs and user-data folders to 1000:1000.
It changes nothing outside those folders, follows no links out of them, and
does not go into another disk mounted inside one. A file that also has another
name elsewhere on the disk (a hard link) is left as it is, since giving it to
1000:1000 would give away that other file too; docker compose logs init
then shows a warning naming the setting and the file. QATrack+ never makes such
files itself. The backups folder is never changed: the backups in it stay
readable by root only.
Folders of QATrack+’s own. Giving files to another user cannot be undone, so
init only does it to folders that are clearly QATrack+’s. Such a folder holds
a small file named .qatrackplus-data. When a folder is empty (as it is when
Docker has just created it), init adds that file itself, so a new site needs
no extra step. If you set a variable to a folder that already holds files and has
no .qatrackplus-data file (a shared folder, say, or the wrong path), QATrack+
does not start, and nothing in the folder is changed: docker compose up
stops with service "init" didn't complete successfully, and
docker compose logs init names the setting and the folder.
When that happens, check the path in .env first: the most common slip is a
folder one level too high, such as /srv/qatrack instead of
/srv/qatrack/media. For a new site, choose an empty folder instead. Only once
you have checked that the folder holds QATrack+’s own data for that setting and
nothing else, such as uploaded files you copied from its volume yourself, mark it
as QATrack+’s:
sudo touch /srv/qatrack/media/.qatrackplus-data
Keep that file in place. restore-media leaves it where it is, and the web
server does not show it. Marking does not help a folder that clearly holds more
than QATrack+’s data for that one setting: init refuses it, marked or not,
if anywhere inside it there is another .qatrackplus-data file (it holds
another of QATrack+’s folders) or a file named like a QATrack+ backup
(db_YYYYMMDD_HHMMSS.dump or media_YYYYMMDD_HHMMSS.tar.gz, also with
anything added to the end, such as .gz). Point the setting at the right
folder instead. Uploaded files, which QATrack+ keeps in the media folder’s
uploads folder, are not checked for backup names, so an old upload with a
name like that does not stop QATrack+.
While init refuses to start, the site stays offline until the setting is
fixed, even if QATrack+ was running before you changed .env: browsers get
502 Bad Gateway, or no answer at all. docker compose logs init says why.
Fix .env and run docker compose up -d again; the site comes back once
QATrack+ has started, usually within a minute. Docker creates any folder named
in .env that does not exist yet, empty and owned by root, even when init
then refuses; remove any you do not want.
For the same reason, each location needs a folder of its own, side by side, as
in /srv/qatrack/media and /srv/qatrack/logs. init refuses to start if
one is inside another, or two settings name the same folder, the backups folder
included. Nested inside the media folder, the log files or the secret key would
be shown by the web server to anyone, without signing in; with the backups
inside, every database backup would be given to user 1000. Do not use
deploy/docker/user-data for QATRACK_USER_DATA_DIR either: that folder
holds your HTTPS certificates and LDAPS CA certificate.
On a Linux server, user id 1000 is often the first person’s account, who could then read the uploaded files. To keep them private, put QATrack+’s folders inside one that only root can open. QATrack+’s containers can still reach them, and nobody else on the server can:
sudo mkdir -p /srv/qatrack
sudo chmod 700 /srv/qatrack
Do not restrict the media folder itself the same way: the web server reads
uploaded files as a different user, and would answer 403 Forbidden. Members of
the docker group can still read everything, as they can any volume: running
Docker is as good as being root, so add only people you would trust with root.
If the folder is on a network share where root cannot change who owns files (an
NFS share with root_squash, for example), init cannot do its work, and
docker compose up stops with service "init" didn't complete successfully.
docker compose logs init shows Operation not permitted. Have the share’s
files owned by 1000:1000 (or mount it with uid=1000,gid=1000); init then
has nothing to change. restore-media runs as root too, so it cannot write to
such a share either: it stops, changing nothing, with a message saying root
cannot write to the uploaded files. To restore onto the share, ask whoever runs
the file server to export it without root_squash (no_root_squash) for the
restore, then to put it back.
On a server with SELinux enforcing, such as Red Hat, Rocky or AlmaLinux, it
depends on whether Docker applies SELinux to its containers. Docker Engine
installed from Docker’s own repository, as linked above, doesn’t unless it is
turned on ("selinux-enabled": true in /etc/docker/daemon.json);
docker info lists selinux under Security Options when it is. When it
is on, the containers are refused every folder on the server until it is
labelled for containers: QATrack+’s folders, and also the backups and
user-data folders in deploy/docker. Without the label on those, the
nightly backup fails (while docker compose ps still shows the backup service
as healthy), and the HTTPS and LDAPS certificates can’t be read. Label them all,
in deploy/docker, before you start QATrack+:
sudo mkdir -p backups user-data/ssl user-data/ldap
sudo semanage fcontext -a -t container_file_t '/srv/qatrack(/.*)?'
sudo semanage fcontext -a -t container_file_t "$(pwd)/backups(/.*)?"
sudo semanage fcontext -a -t container_file_t "$(pwd)/user-data(/.*)?"
sudo restorecon -R /srv/qatrack backups user-data
If QATRACK_BACKUPS_DIR puts the backups somewhere else, label that folder in
place of backups.
Moving a site’s data from a volume to a folder. For example, for the
uploaded files, in deploy/docker:
Stop QATrack+, so nothing changes while the files are copied:
docker compose stopCopy everything from the volume into the new folder, keeping each file’s owner, permissions and dates, and mark the folder as QATrack+’s (see above). Docker creates the folder if needed:
docker run --rm -v qatrackplus_media-volume:/from:ro -v /srv/qatrack/media:/to alpine sh -c "cp -a /from/. /to/ && touch /to/.qatrackplus-data"Add
QATRACK_MEDIA_DIR=/srv/qatrack/mediato.env, and start QATrack+:docker compose up -dCheck that nothing was missed. These two commands count the files in the old volume and in the new folder (leaving out the
.qatrackplus-datafile), and should print the same number:docker run --rm -v qatrackplus_media-volume:/d:ro alpine sh -c "find /d -type f ! -name .qatrackplus-data | wc -l" docker run --rm -v /srv/qatrack/media:/d:ro alpine sh -c "find /d -type f ! -name .qatrackplus-data | wc -l"
Then open a few attachments in QATrack+, and make a backup with
docker compose exec backup backup.Only once you are happy, delete the old volume. Until then it is your way back (see below).
docker volume rm qatrackplus_media-volume
The log files and the secret key move the same way, with logs-volume and
QATRACK_LOGS_DIR, or user-data-volume and QATRACK_USER_DATA_DIR. If
you move the user-data folder without copying the key, QATrack+ makes a new one,
and everyone is signed out once. The backups are already in a folder: stop
QATrack+, copy them across (sudo mkdir -p /mnt/backups/qatrack, then
sudo cp -a backups/. /mnt/backups/qatrack/), set
QATRACK_BACKUPS_DIR=/mnt/backups/qatrack, and start it again.
Moving back to the volume. Files uploaded while QATrack+ used the folder are
only in the folder, so copy it back into the volume before you go back, or they
will seem to be missing. For the uploaded files, in deploy/docker:
Stop QATrack+:
docker compose stopCopy the folder’s contents into the volume, in place of the older files still there from before the move. If you have already deleted the volume, Docker creates it again (
docker composethen warns that it did not create that volume itself, which is harmless):docker run --rm -v /srv/qatrack/media:/from:ro -v qatrackplus_media-volume:/to alpine sh -c "find /to -mindepth 1 -delete && cp -a /from/. /to/ && rm -f /to/.qatrackplus-data"Remove the
QATRACK_MEDIA_DIRline from.env, start QATrack+ withdocker compose up -d, and check, as above, that the volume and the folder hold the same number of files. Keep the folder until you are happy.
The log files and the secret key go back the same way.
Backups and restores. The nightly backup reads the uploaded files from
wherever QATRACK_MEDIA_DIR points, and restore-media puts them back there,
so the backup and restore commands above do not change (on an NFS share with
root_squash, see the note on network shares above). restore-media unpacks
the backup into a temporary .restore.* folder inside the media folder, then
swaps the files in by renaming them, so the media folder needs room for a second
copy of the uploaded files while it runs, and should not have another disk
mounted inside it. The web server does not show what is in a .restore.*
folder. If your own backup system also copies the media folder, let it copy any
.restore.* folder too: one left by a restore that was stopped outright can
hold the only copy of the uploaded files from before that restore (see
Backing up and restoring). Keep
the database and the uploaded files from the same night together: a restore
needs both. docker compose down -v removes QATrack+’s volumes, but never
deletes a folder on the server.
Running QATrack+ day to day
Run every command in this section from the deploy/docker folder, for
example ~/web/qatrackplus/deploy/docker. docker compose finds
QATrack+’s compose.yaml and .env there.
Making QATrack+ start on boot and run in the background
To start QATrack+ in the background run the following command:
docker compose up -d
Every QATrack+ service is set to restart on its own, so once started this way,
QATrack+ also starts again whenever the server restarts, as long as Docker
itself starts on boot. Docker’s packages for Ubuntu set that up for you; on
other distributions, sudo systemctl enable docker does it.
Shutdown the server
To shutdown the server run:
docker compose stop
docker compose up -d starts it again, and docker compose restart stops
and starts it in one step. A site stopped this way starts again if the server
restarts. To keep it stopped until you start it yourself, use
docker compose down instead (see Removing QATrack+ from a server: plain down
keeps all of your data). If you started QATrack+ with docker compose up
(without -d), you can also single press Ctrl + C within that terminal to
gracefully shutdown the server.
Background tasks and logs
Scheduled notifications, scheduled reports and the emails they send run in the
django-q service. docker compose ps shows it, with the other services, as
healthy, and docker compose logs django-q shows what it has run.
docker compose logs keeps at most 50 MB of each service’s output, and starts
again empty when a container is recreated, for example by an upgrade.
QATrack+’s own log files (debug.log, auth.log and the others) are kept in
the logs-volume volume (or the folder QATRACK_LOGS_DIR names; see
Keeping QATrack+’s data in folders on the server) and survive upgrades. Each file only appears once
QATrack+ has something to write to it, so on a brand-new site the folder may
still be empty, or have only some of them. To see which files there are, run:
docker compose exec django ls logs
Then read the end of one from that list, for example debug.log:
docker compose exec django tail -n 50 logs/debug.log
Update server
Before you update, check that your Docker still meets the minimum versions (Compose 2.17, Engine 23.0). An older Compose can’t build or start the new release, so if you find out first, your site keeps running while you update Docker:
docker compose version
docker version --format '{{.Server.Version}}'
Then get the new code and build it. Your site keeps running while you do this:
git pull
docker compose build
Once the build has finished without errors, swap the running containers for the new ones:
docker compose up -d
There’s no need to stop the site first: up -d replaces each container that
has changed, so QATrack+ is only unavailable while they restart. If the build
stops with an error instead, nothing has been stopped and your site carries on
running the version it had before.
Read the release notes before you update: they say
when a release needs anything from you. If you changed one of QATrack+’s own
files, such as the port in compose.yaml, and git pull stops with Your
local changes to the following files would be overwritten, keep your change with
git stash, as the Docker upgrade guide
shows.
If your QATrack+ folder was copied from a Windows computer
Files under deploy/docker run inside Linux containers and must have LF line
endings. Git checks them out that way, whatever its settings. But a QATrack+
folder first cloned on a Windows computer before QATrack+ 4.0.2, and then copied
to your Linux server, may still have CRLF copies, which stop the containers
building or starting. To check them out again, run the following from the
qatrackplus folder. It replaces the tracked files under deploy/docker
with fresh copies, so the first and last lines save your own changes to them
(any edits to nginx.conf or the compose files) and put them back. Your
.env is not tracked by git, so it is left alone, as are untracked folders
such as user-data and backups.
git diff HEAD --output=../qatrack-docker-local.patch -- deploy/docker
git rm -r --cached -q deploy/docker
git checkout HEAD -- deploy/docker
git apply --allow-empty ../qatrack-docker-local.patch
--allow-empty needs git 2.35 or newer. Delete qatrack-docker-local.patch
once you have checked that QATrack+ starts.
Accessing the Django shell
If you need to access the Django shell run the following:
docker compose exec django python manage.py shell
Any other management command runs the same way, for example
docker compose exec django python manage.py check. QATrack+’s Python
environment is already active inside the container, so there is nothing to
activate first. This requires that the containers are already running.
The shell works directly on your clinic’s live database, so take a backup first
(docker compose exec backup backup) if you are going to change anything.
Removing QATrack+ from a server
To stop QATrack+ and remove its containers, run:
docker compose down
This keeps all of your data: the database, uploaded files, log files and secret
key stay in their Docker volumes (or folders), and docker compose up -d
brings QATrack+ back as it was.
Warning
docker compose down -v also deletes QATrack+’s Docker volumes, and this
cannot be undone. That is your database, the uploaded files (unless
QATRACK_MEDIA_DIR puts them in a folder), the generated secret key
(unless QATRACK_USER_DATA_DIR does) and the log files. Folders on the
server, such as deploy/docker/backups and any QATRACK_*_DIR folder,
are never deleted.
Before you run it, make a backup with docker compose exec backup backup,
and copy the backups folder, your .env, user-data/ssl and
user-data/ldap somewhere off the server (see Backing up and restoring). Only run it when you mean to
remove QATrack+ for good, or to start again with an empty site.
To remove QATrack+ completely, run docker compose down -v --rmi all, which
also removes the images Docker built or downloaded for QATrack+. Then delete the
qatrackplus folder once you are sure you have everything you need from it,
including deploy/docker/backups.
Don’t use Docker’s general clean-up commands that remove volumes, such as
docker volume prune --all, on a server running QATrack+. Once QATrack+’s
containers have been removed, for example by docker compose down, those
commands treat its volumes as unused and delete them, database included.
Developing with Docker
The commands above run the QATrack+ code built into the image. To work on
QATrack+ itself, run your checkout instead, so code changes show up without
rebuilding. QATrack+ then writes into your checkout (its log files, for
example), so it runs as your own user. Add your user and group ids to .env
once, then start with the development overlay:
printf '\nQATRACK_UID=%s\nQATRACK_GID=%s\n' "$(id -u)" "$(id -g)" >> .env
docker compose -f compose.yaml -f compose.dev.yaml up -d --build
Use the same -f compose.yaml -f compose.dev.yaml on every docker compose
command for that stack. QATrack+’s log files go to your checkout’s logs
folder, which is given to your user when the stack starts, even if an earlier
QATrack+ container created it as root.